1. Introduction
The purpose of this article is to make the Cypress learning easy for the beginners who have no idea about the Cypress. We have created a Cypress-mocha framework project and we are going to explain how to build the code for testing from scratch i.e. from what the prerequisite required for Cypress installation to How to run the Tests. Also we have used different Cypress features in our project and explained in this article.
The features we have covered are POM, Locators strategy, Custom commands, Assertions, Fixtures, Mocha hooks, Lodash glimpse.
2. Setup and Installation
2.1. Download Node & NPM :
What is Node -> Node allows developers to write JavaScript code that runs directly in a computer process itself instead of in a browser.
What is NPM -> It is Node Package Manager for JavaScript Programming language. It is the default package manager for the JavaScript runtime environment Node.js. It consists of a command line client, also called npm, and an online database of public and paid-for private packages, called the npm registry. Download Node, NPM is also coming along with Node. By Node Package Manager we can install JavaScript based Framework .
2.1.1 Let’s install Node.js
Direct link to install Node.js : https://nodejs.org/en/download/ -> download Node.js for Windows by clicking the “Windows Installer” option -> Run the downloaded Node.js .msi Installer – including accepting the licence, selecting the destination, and authenticating for the install. -> To ensure Node.js has been installed, run “node -v” in your terminal – you should get something like v16.15.0 .
Or you can do along with us by step by step as follows:
a. Go to Google
b. Search for “Download nodejs” and click on the first displayed result.
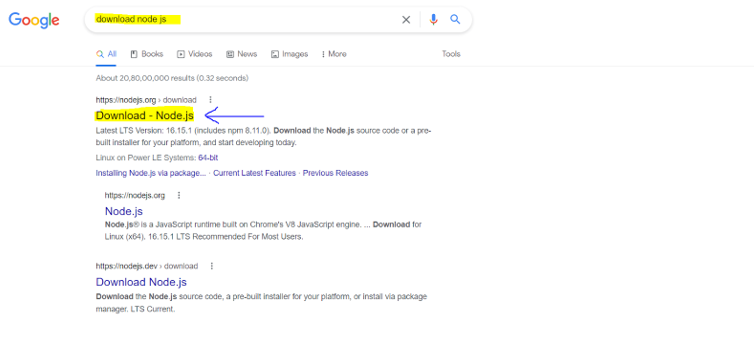
c. We are installing Node.js for windows so click on Windows Installer (.msi) 64 -bit.

d. Once you click on 64-bit, it gets installed on your system.
e. Go to the location path where node.js installed -> Double click on the file and it starts installing Node.
f. Now go to the location path where node.js installed -> check for “nodejs” folder. Open the folder. Here you can see the multiple files for Node.js.
g. Now we have to configure the Path. So we need to create an environment variable for this nodejs so that we can run this nodejs anywhere from the system.
h. Double click on the address bar(highlighted) and Copy the location as shown in below image:

Right click on “This PC” -> Go to Properties -> Advanced system settings -> goto Environment Variables and here we need to create Node home.
Click on “New” under system Variable -> Set Variable Name – “NODE_HOME” and specify the path of the nodejs in Variable value->click on OK. as shown in below image:
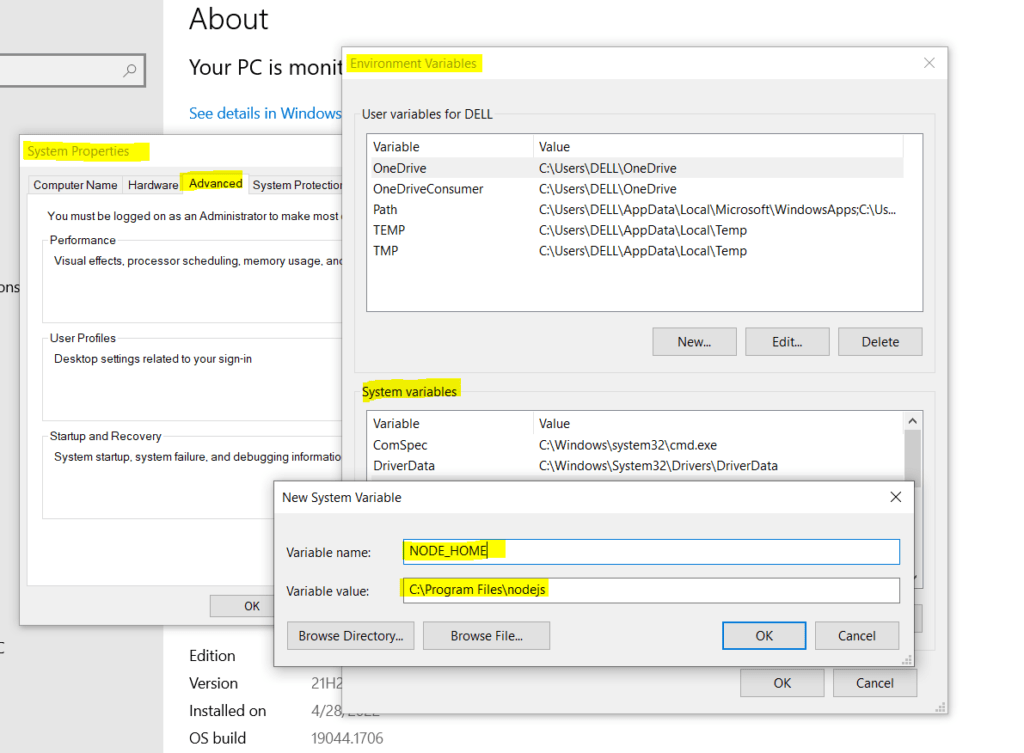
By doing this steps we have installed Node.js which will provide you with the environment. On top of it we can install JavaScript based frameworks like Cypress, Protractor etc.
2.2 Create Cypress Working Folder :
Next, we will create a working folder “CypressMochaFramework” folder in D:/ drive( you can create anywhere you want on the system) where we are going to create our cypress tests. The created folder is acting as a Project.
2.2.1 Generate Package.json file.
In the Node environment if you want to download any software you need package.json so that node will read the package.json file and accordingly download required software. So we need to specify what kind of software we want to download.
Open the working folder, which we have created in D:/ Open the folder in Command Prompt.
Select the location path by clicking on the address bar
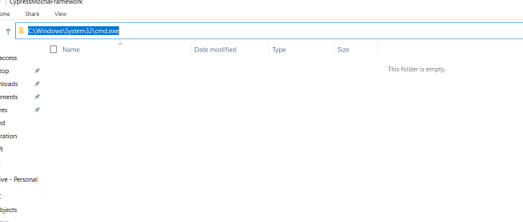
Type cmd address bar and hit enter.

So the folder gets opened in cmd.
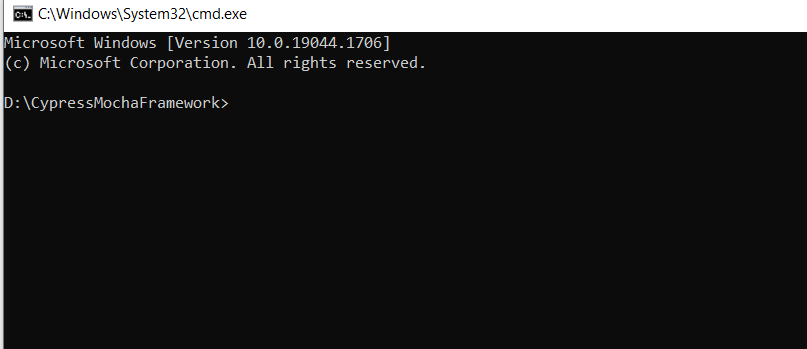
So in this folder we have to generate “package.json” where we can specify the dependencies and then we can install Cypress. To generate the “package.json” we have to run command “npm init”

Once you execute this command it will ask you for package name, here I am giving name as “CypressMochaFramework” ,you can give any name. Hit enter.

Keep all the things as it is, keep hitting enter.
“Is this OK? (yes) yes” and hit enter.

Here the “package.json” file is generated in the same location.
2.3 Install Cypress:
Note: While writing this article and downloading the Cypress, the Cypress version we are using is: Cypress “9.6.0″ and the latest version launched by Cypress is ver 10.
Go to project location on cmd and execute the command:
“npm install cypress –save-dev”

Or you can install cypress with particular version by executing below command:
“npm install –save-dev cypress@9.6.0”

This npm install cypress will download the cypress and make entry in package.json.
In future if you move the project to a different location just execute the command “npm install cypress” because in your project package.json already has downloaded cypress.
You can refer to https://docs.cypress.io/guides/getting-started/installing-cypress.
Here the “package.json” file is generated in the same location.
2.4 Download The Visual Studio code Editor
To write our cypress tests we need an editor, so here we are using the Visual Studio code Editor.
Here is the direct link to install VS code editor: https://code.visualstudio.com/download -> Click on “Windows” -> VSCodeUserSetup file get downloaded -> click on it and do the installation.
Or Let’s install Visual Studio Code Editor step by step with us –
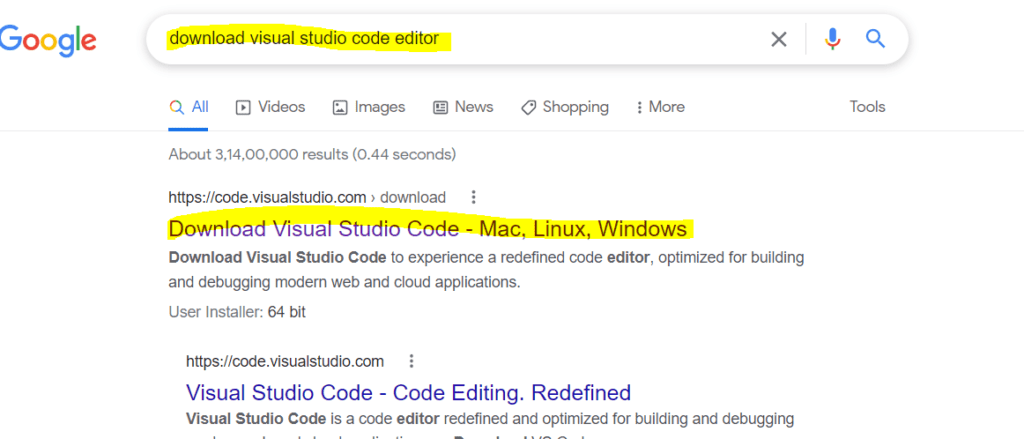
Go to Google -> search for “download visual studio code editor” click on the first displayed result.
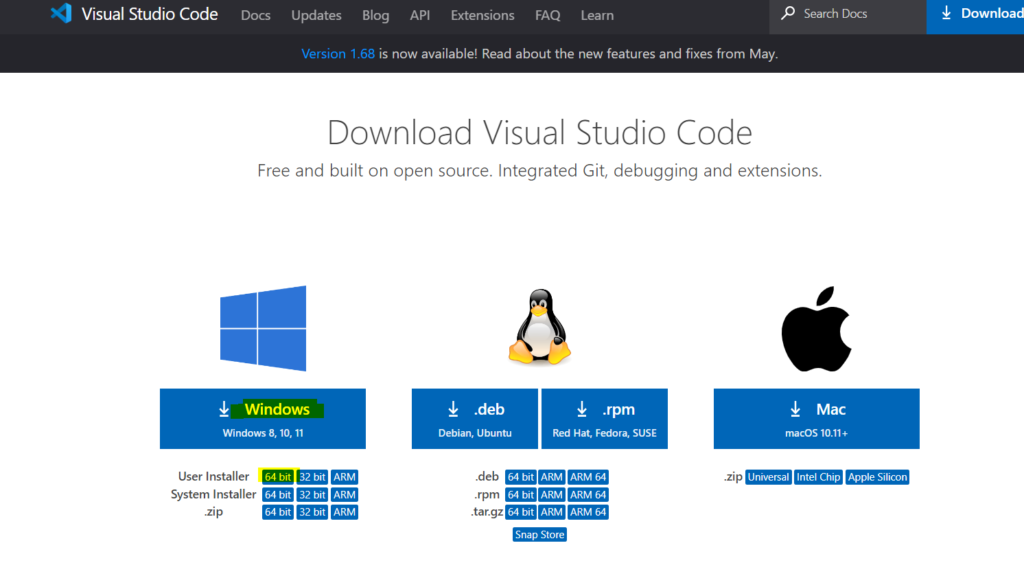
Currently we are working on Windows so click on “ windows” ,it will automatically get downloaded.
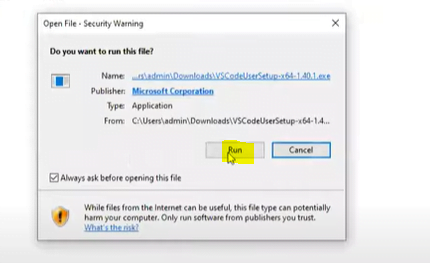
Once it gets downloaded, install it by double clicking on the file.
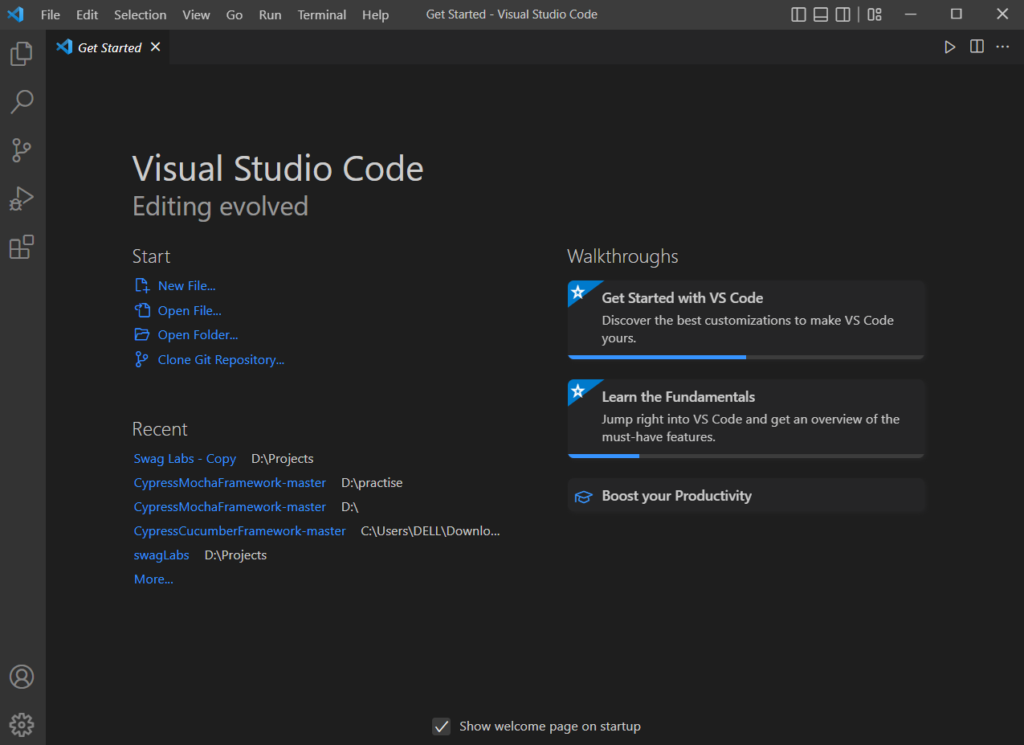
Once installation is done, launch the Visual studio.
This is how we installed the code editor for Cypress.
Now, Let’s open the working folder we have created earlier
File -> Open New Folder -> Select the project from the Location path.

Here, project Setup is done. And you can see the package.json file which we have created earlier.
2.4.1 Test Runner:
Test Runner is nothing but the entry point to kickstart the execution of test cases in Cypress. It is an Open-source component and installed locally. It helps you to set up and start writing test cases using JavaScript.
Let’s see how to launch the Test Runner:
Go to the Visual Studio -> Import your project -> click on Terminal ->click on New Terminal

2.4.2 How to open the Cypress
We have two commands to open the cypress:
1. npx cypress open
2. node_modules\.bin\cypress open
You can use any one command, here I am executing the second command on the terminal to open cypress.
“node_modules\.bin\cypress open”

As whatever commands will run for cypress are in the node_modules directory.
Below is the Test runner window.

After running the command for Test Runner, we will get an extra folder named ”cypress” in your working project. This is nothing but the project folder structure provided by Cypress.

3. How to Run tests in Cypress
3.1 With Commands -
Before running the test we will add the cypress command to the scripts object in package.json file and call it from an npm run script_name
some scripts in the “package.json” file, which will be helpful for repetitive tasks like opening the Cypress and running the Cypress.
Firstly open the package.json file and in the script block add commands “cypress:open” to open cypress shown below and save the file. Why cypess:open ? so the reason is Cypress will automatically find and allow you to use the browsers installed on your system.

a. Open your project in Visual studio code editor -> open Terminal -> enter the command
“npm run cy:run ” ,the command we are importing from scripts block in the package.json file.
b. Once you run the command our tests will run on the terminal, it will not open the browser separately .

Here after running the command in the terminal, we got the result.
It shows the Cypress version, which we have installed earlier.
Then it shows the browser, and in which mode, it will execute the runs. By default, it uses the Electron browser in headless mode to execute the runs, but it can be changed bypassing these as a parameter in the Cypress run command.
Spec count, which shows how many test files were present in the “integration” folder and their respective names.

3.2 With UI-
a. Open your project in Visual studio code editor -> open Terminal -> enter the command
“npm run cypress:open ” ,the command we are importing from scripts block in the package.json file.

b. Test runner opened and you can see our two spec files

c. Click on login.spec.js to run and it will start the execution

d. After execution, when you click on first test case it will show the execution steps:

This is how we can Run our Tests in Cypress.
4. Folder Structure in Cypress

In other automation tools, we have to create folder structure manually but cypress gives it by default when we open a Cypress.
Some of the basic folders we have used in our ”CypressMochaFramework” project as bellows:
4.1. Fixtures -
Fixtures hold test data. The fixture is a directory present in cypress where the user can maintain all their test data files required for test execution. Users can store data in the form of an xml file,json file or any document.

Here in the CypressMochaFramework Project we have used the username and password as a test data which is a .json file and stored in the fixture folder.
4.2. Integration -
Inside the integration folder we can create Test cases. To get a better organize you can either create a folder to write your tests. So we always create test cases only in the integration folder.

4.3. Plugins -
Plugins are nothing but the event listeners. Event listeners maintain the record of all the events and respond (Pass/Fail/Wait) according to the execution of the events.

Here in Cypress index.js works as an event listener.
4. 4 Support
The support folder is used to store the script for reusable behaviors such as custom commands or any global function which we want to use in all spec files.

In our project in command.js under the support folder we have created the function code for Login and Logout respectively.
4.5. node_modules -
Node_modules is the main folder of the cypress as it stores all the npm files and dependencies required to run the test.
4.6. cypress.json -
cypress.json file used to specify the configuration of cypress. configuration data like the base URL, timeout, on/off screenshots for the failed test, on/off the video for headless test executions.

4.7. Package.json -
The Package.json file contains metadata and required libraries from the project. All the dependencies are stored here.

5. Features

5.1 Page Object Model in Cypress (POM):
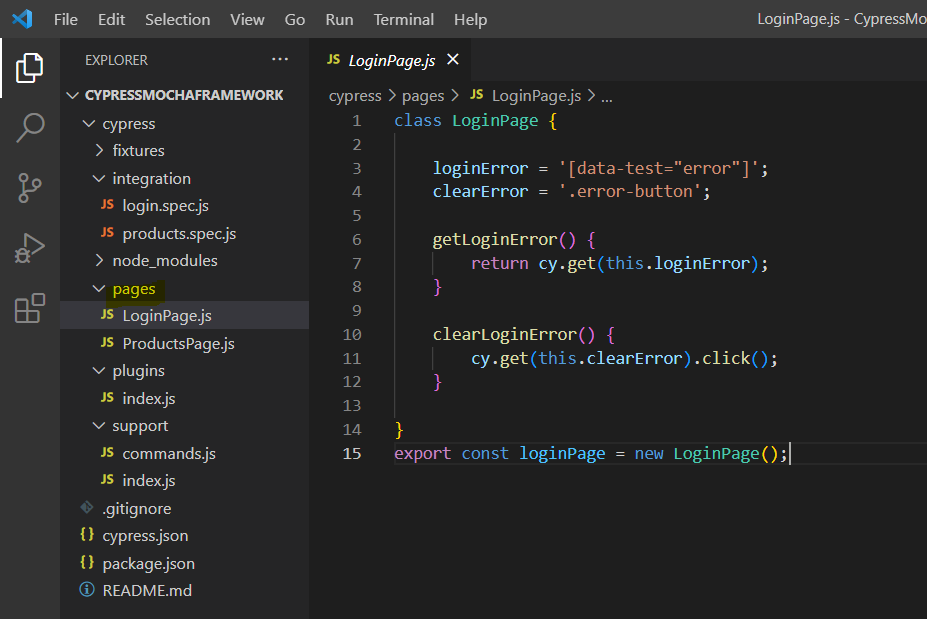
Page Object Model is a design pattern where the page objects are separated from the automation test scripts. Page Object Model has many advantages in creating a framework for test automation, such as reducing code duplication and increasing maintainability and readability. Cypress provides us the flexibility to incorporate Page Object Model in the test script .The page object is a design pattern that is an object-oriented class that interacts with the pages of the application that we are testing.
Implementation of POM, we need to create a page class. A page class contains a web element’s locator and the methods to interact with the web elements. And to achieve this let’s create a “Page” folder under cypress and add your tests by creating the test files, as shown below
5.2 Locators in cypress :
Locators are nothing the objects that used to find the elements on the web pages by using the query. In automation, to perform any operation on web pages/web elements, you have to locate or identify an element and perform action on that element.
The Locators or you can say selectors help us to locate the element in the web pages. There are different types of Locators such as id, css, x-path etc.
Cypress supports Cascading Style Sheets(CSS) selectors .

Some tips to select good Locators:
1. If an application uses dynamic classes or id’s that change then do not target the elements based on CSS attributes like id’s, class, tag.
2. Do not target the elements that may change their “textContent”
3. Add “data-*” attributes to target the element easily.
In our “CypressMochaFramework” project we have used highlighted selectors to locate the element. Here we have used id and class name to locate the element.
You can refer the link to know more https://docs.cypress.io/guides/references/best-practices#Selecting-Elements
5.3 Custom Commands in Cypress:
Commands are nothing but the set of actions. Cypress also provides the set commands which affect the user actions and also allows you to define a command on your own by providing additional functionality. These commands are “cypress custom commands”.
A custom command is similar to a cypress command but the only difference is it is defined by the user.
These customized commands are used to create the test steps that are repeated in an automation flow.
We can add and overwrite an already pre-existing command. They should be placed in the commands.js file within the support folder present in the Cypress project.

The syntax for the custom commands –
Cypress.Commands.add(function-name, func)
5.4 Chai Assertions :
Assertions- The assertion is a condition that checks whether the program contains any bugs or not and to meet the client’s specifications. The assertion is mainly used to detect the errors in the program.
Cypress has a popular chai assertion library .
Chai assertion is BDD/TDD assertion library for node and the browsers that can be compatible with JavaScript testing framework.
Default assertions in Cypress:
5.4.1. cy.get() -
The get command expects the element to exist in the DOM first before trying to access it

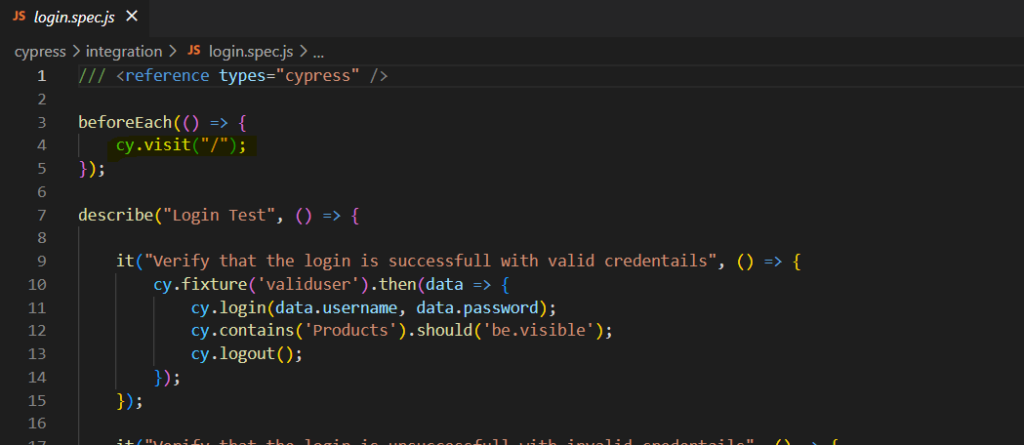
5.4.2. cy.visit() -
Whenever you visit the webpage, cypress expects the page to return with a 200 status code that is Pass.
5.4.3. Implicit Assertion -
When the assertion applies to the object provided by the parent chained command, it’s called an Implicit assertion.
The Implicit assertion uses should() or the and() commands for assertion. These commands don’t stand independently and always depends on the previously chained parent command

5.4.4. Explicit Assertions -
When there is a need to pass an explicit subject for the assertion, it falls under the category of Explicit assertion. This explicit assertions contains expect() and assert()
Example: expect(condition).to.be.true expect(5>2).to.be.true
// The the explicit subject the boolean: true
5.5 Fixtures
As we already know, Fixtures hold test data, used to handle static test data in Cypress Test. For example, store your username and password for your test. To get Fixtures you need to install the Cypress first. Once installed, click on the Cypress and under Cypress you will notice that the ‘Cypress’ repository will be created in your project folder, and its contents.

In our project framework we have used a fixture folder to store the username and password.

To know more about Fixtures visit : https://docs.cypress.io/api/commands/fixture
5.6 Mocha Hooks
Hooks are used to carry out the certain operations prior/post every/each test.
With its default “BDD”-style interface, Mocha provides the hooks .
Some of the common hooks are as follows − before(), after(), beforeEach(), and afterEach()
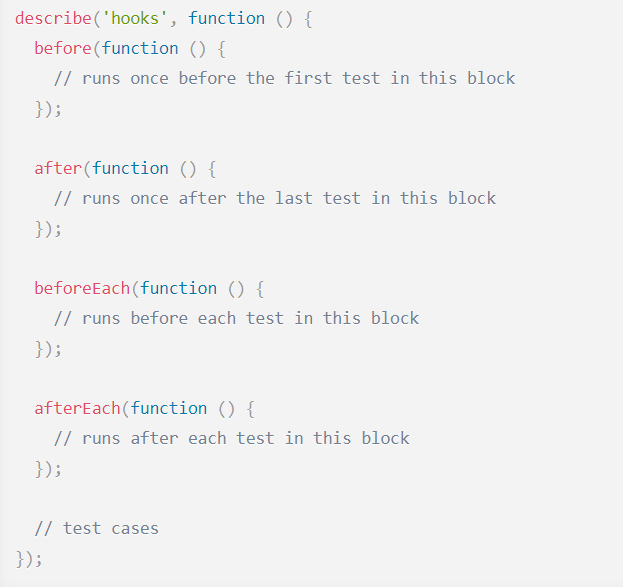
Tests can appear before, after, or interspersed with your hooks. Hooks will run in the order they are defined, all before() hooks run (once), then any beforeEach() hooks, tests, any afterEach() hooks, and finally after() hooks (once).
Apart from hooks Cypress has Tags – .only and .skip
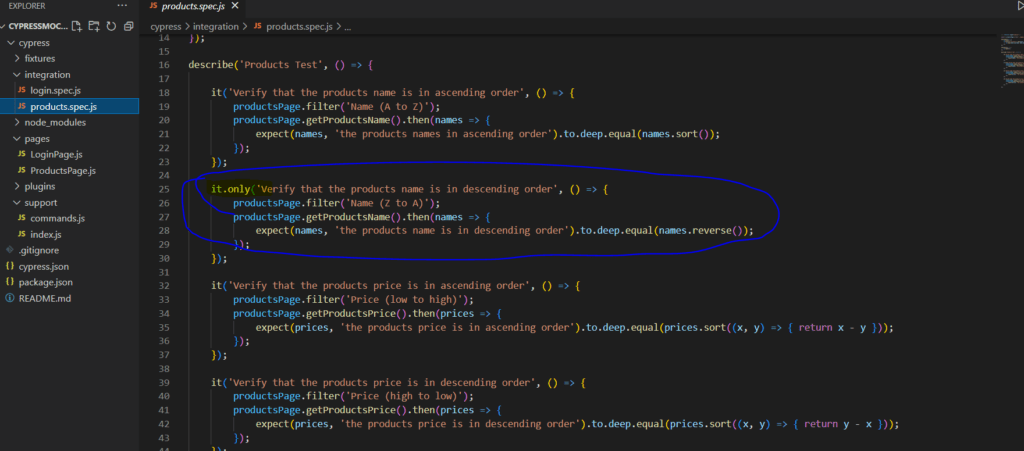
.only – This .only tag allows you to run only the specific suite or test-case by appending .only to the function.
In our project we have used the .only for test-case , so here the only one “it block” which is defined as “it.only( ) ” will run among the all defined “it blocks” .
5.7 Lodash Glimpse
Lodash is a JavaScript library which makes it easy to work with arrays, numbers, objects, strings etc. Instead of writing the repetitive function with multiple line code, Lodash library makes it easy in a single line of code as it provides us with various inbuilt functions. It provides various inbuilt functions for collections, arrays, to manipulate objects, and other utility methods that we can use directly instead of writing them from scratch.
For more details check the page: https://lodash.com/
https://lodash.com/docs/4.17.15
In our framework we have used the Lodash _.concat() function, which is used to concatenating the arrays in JavaScript.
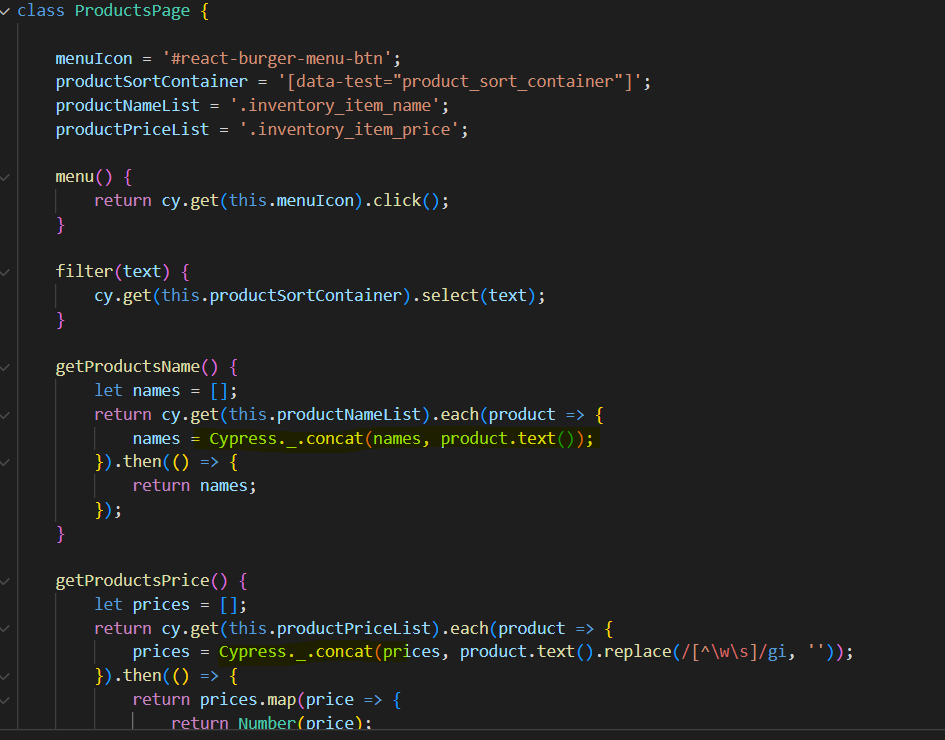
6. Framework Sample Code
Framework and article created by…
Shrutika Kawade
QA Engineer
